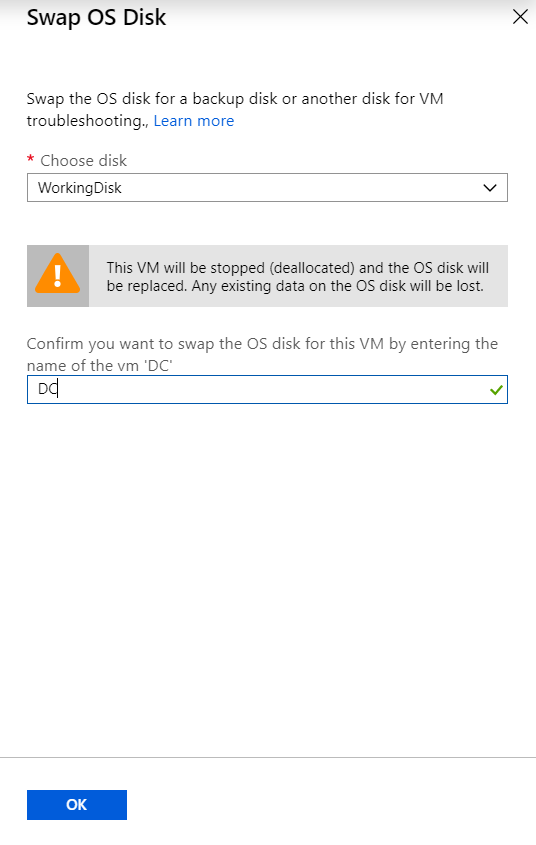
Have you ever been in a situation where you did the troubleshooting for a VM by attaching its OS Disk as Data Disk to other Azure VM? Then created Azure VM out of that OS Disk. It’s a painful process. What if we can swap the existing OS Disk of an Azure VM? So you don’t have to delete and recreate VM.
Well, there is an option to do that. It’s been here for a quite long time with the unmanaged disk, and it’s available for Azure Managed Disk as well. There are multiple ways to do the same. We will focus on the Azure Portal and PowerShell.
To swap the OS Disk, follow the below instructions on the Azure Portal:
- Go to the Azure VM of which you want to replace the OS Disk
- Stop the VM
- Select Disks from the blade

- Click on Swap OS Disk option
- Choose the disk you want to replace with and provide the name of the VM

- Click OK after filling above entries
- Once the swapping is complete, you can start the VM
If you prefer PowerShell use below cmdlets to Swap the OS Disk:
# Get the VM $vm = Get-AzVM -ResourceGroupName myResourceGroup -Name myVM# Make sure the VM is stopped\deallocated Stop-AzVM -ResourceGroupName myResourceGroup -Name $vm.Name -Force# Get the new disk that you want to swap in $disk = Get-AzDisk -ResourceGroupName myResourceGroup -Name newDisk# Set the VM configuration to point to the new disk Set-AzVMOSDisk -VM $vm -ManagedDiskId $disk.Id -Name $disk.Name# Update the VM with the new OS disk Update-AzVM -ResourceGroupName myResourceGroup -VM $vm# Start the VM Start-AzVM -Name $vm.Name -ResourceGroupName myResourceGroup
I believe this process will make your VM troubleshooting easy.
Hello, could you also provide steps to swap an un-managed OS disk of an Azure VM? As you know, there is no option in the Disks selection area for a VM with an un-managed OS disk. Thanks.