Have you ever been in a situation where you wanted to have Private endpoint for Azure PaaS services like Azure SQL Database, Azure Storage Account etc.? Or, If any customer/user asked you for this? Then the answer was mostly no since these services have a Public endpoint which means the Traffic will route through the Internet.
Due to these pain points, Microsoft released a new service called Azure Private Link. Azure Private Link enables you to access Azure PaaS Services (for example, Azure Storage, ASK, CosmosDB and SQL Database) and Azure-hosted customer-owned/partner services over a Private Endpoint in your virtual network. Traffic between your virtual network and the service traverses over the Microsoft backbone network, eliminating exposure from the public Internet.
Azure Private Endpoint is a network interface that connects you privately and securely to a service powered by Azure Private Link. Private Endpoint uses a private IP address from your VNet, effectively bringing the service into your VNet.
Let’s start the deployment of Azure Private Endpoint using Azure Portal:
Create an Endpoint:
1. I have already created a Windows-based Azure VM to test the connectivity and an Azure SQL Database for which we will create a Private Endpoint.
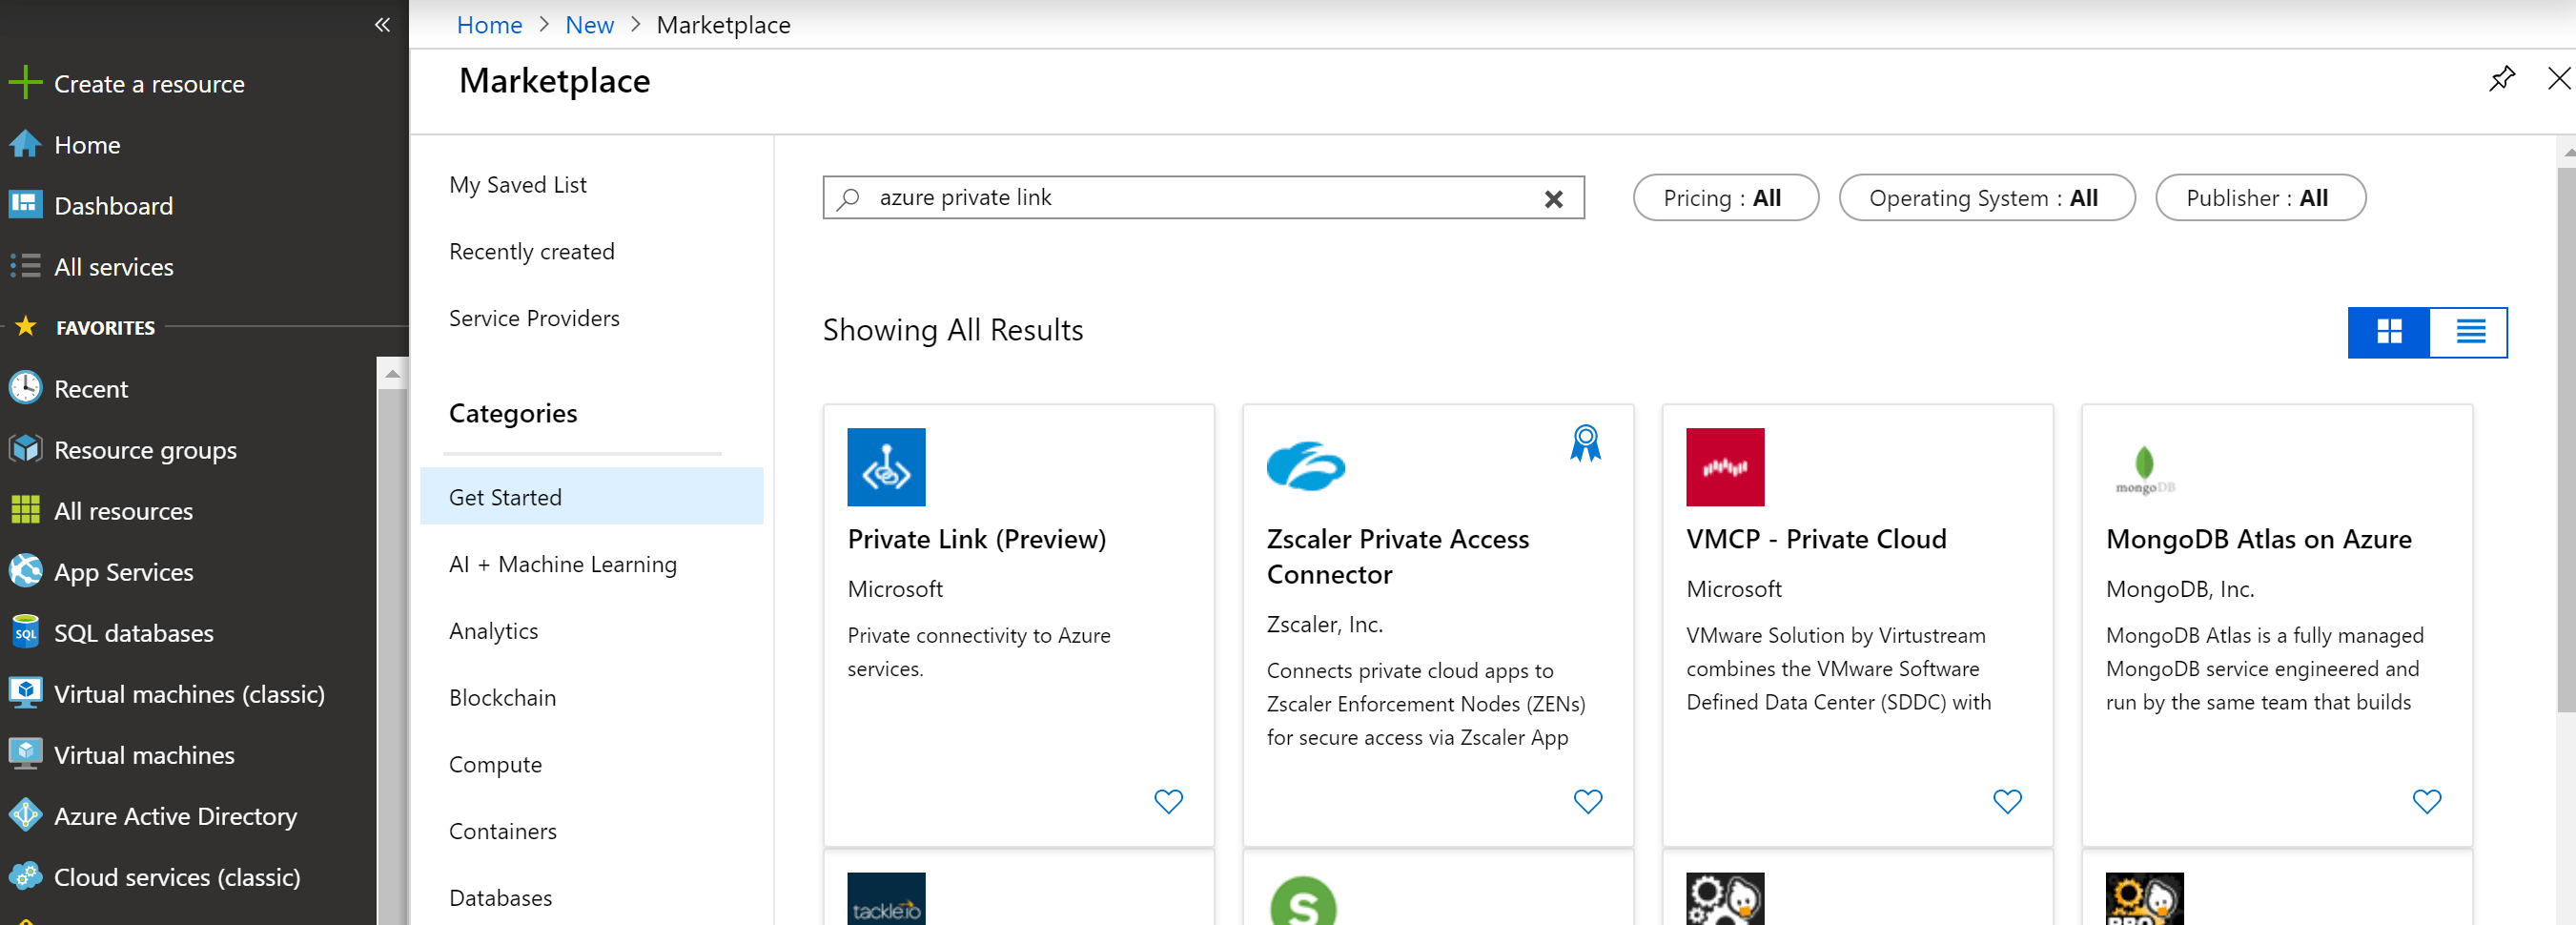
2. Go to Azure Portal and click on Create a resource and search for Azure Private Link. And then select Private Link (Preview) and hit Create button.
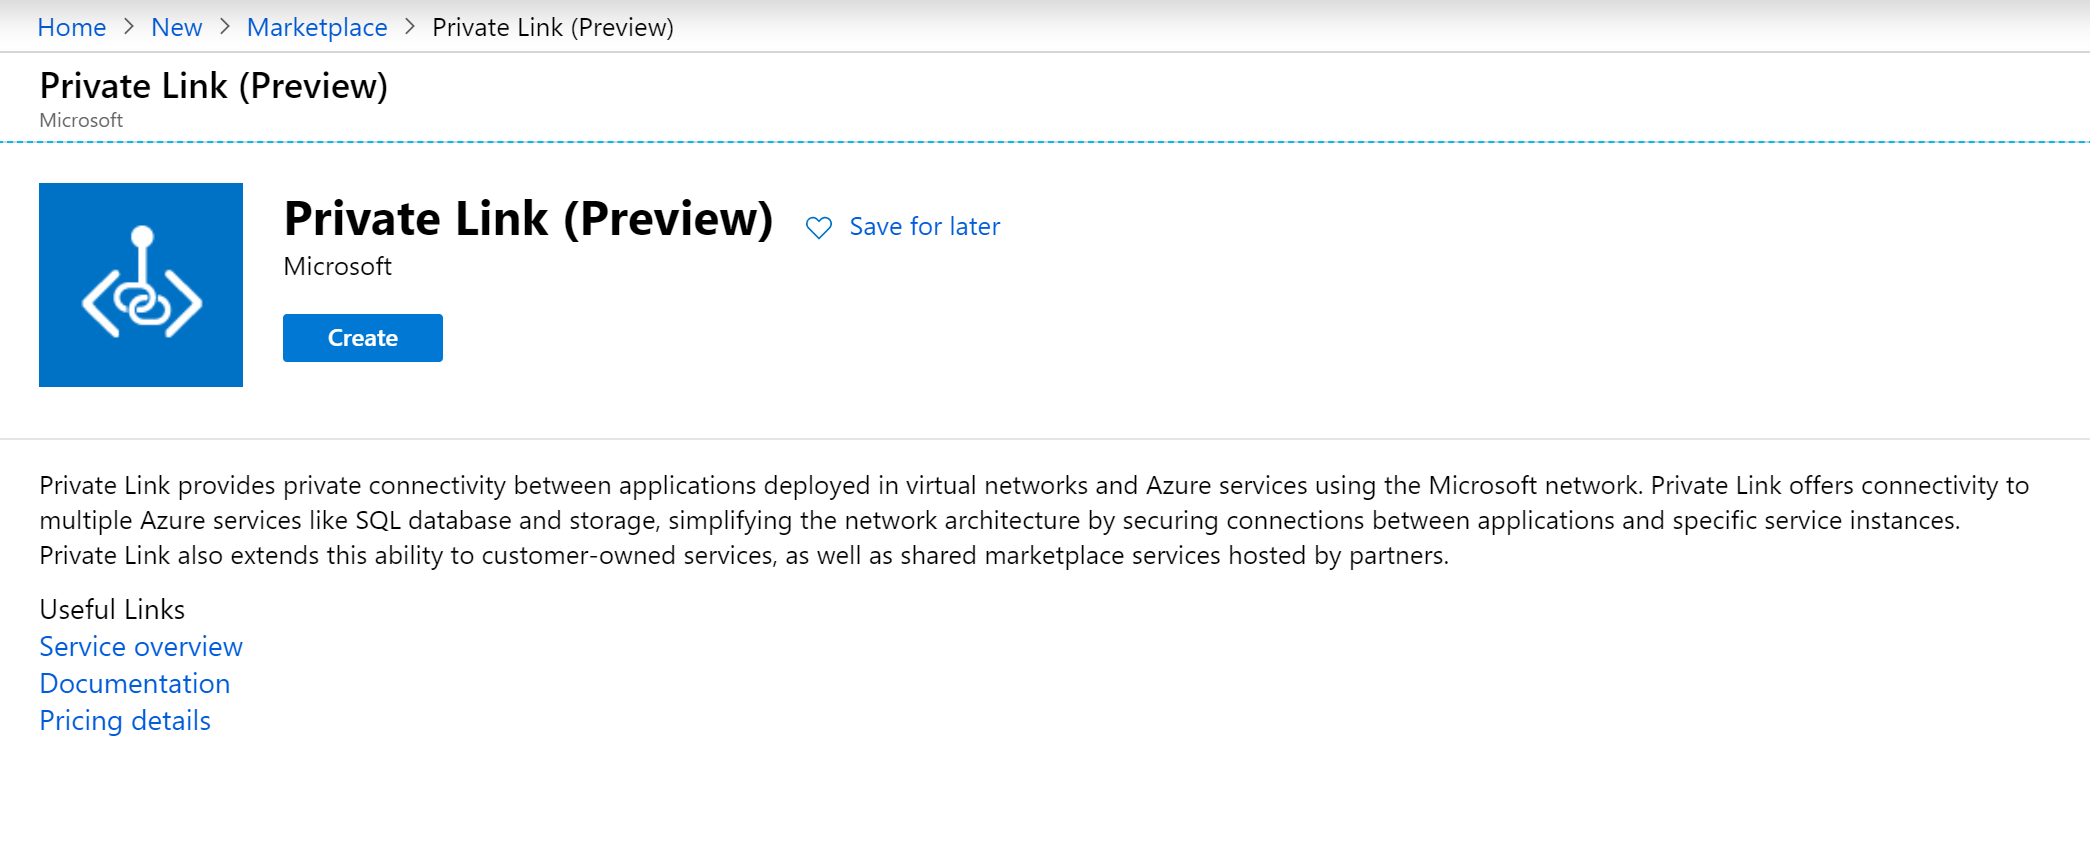
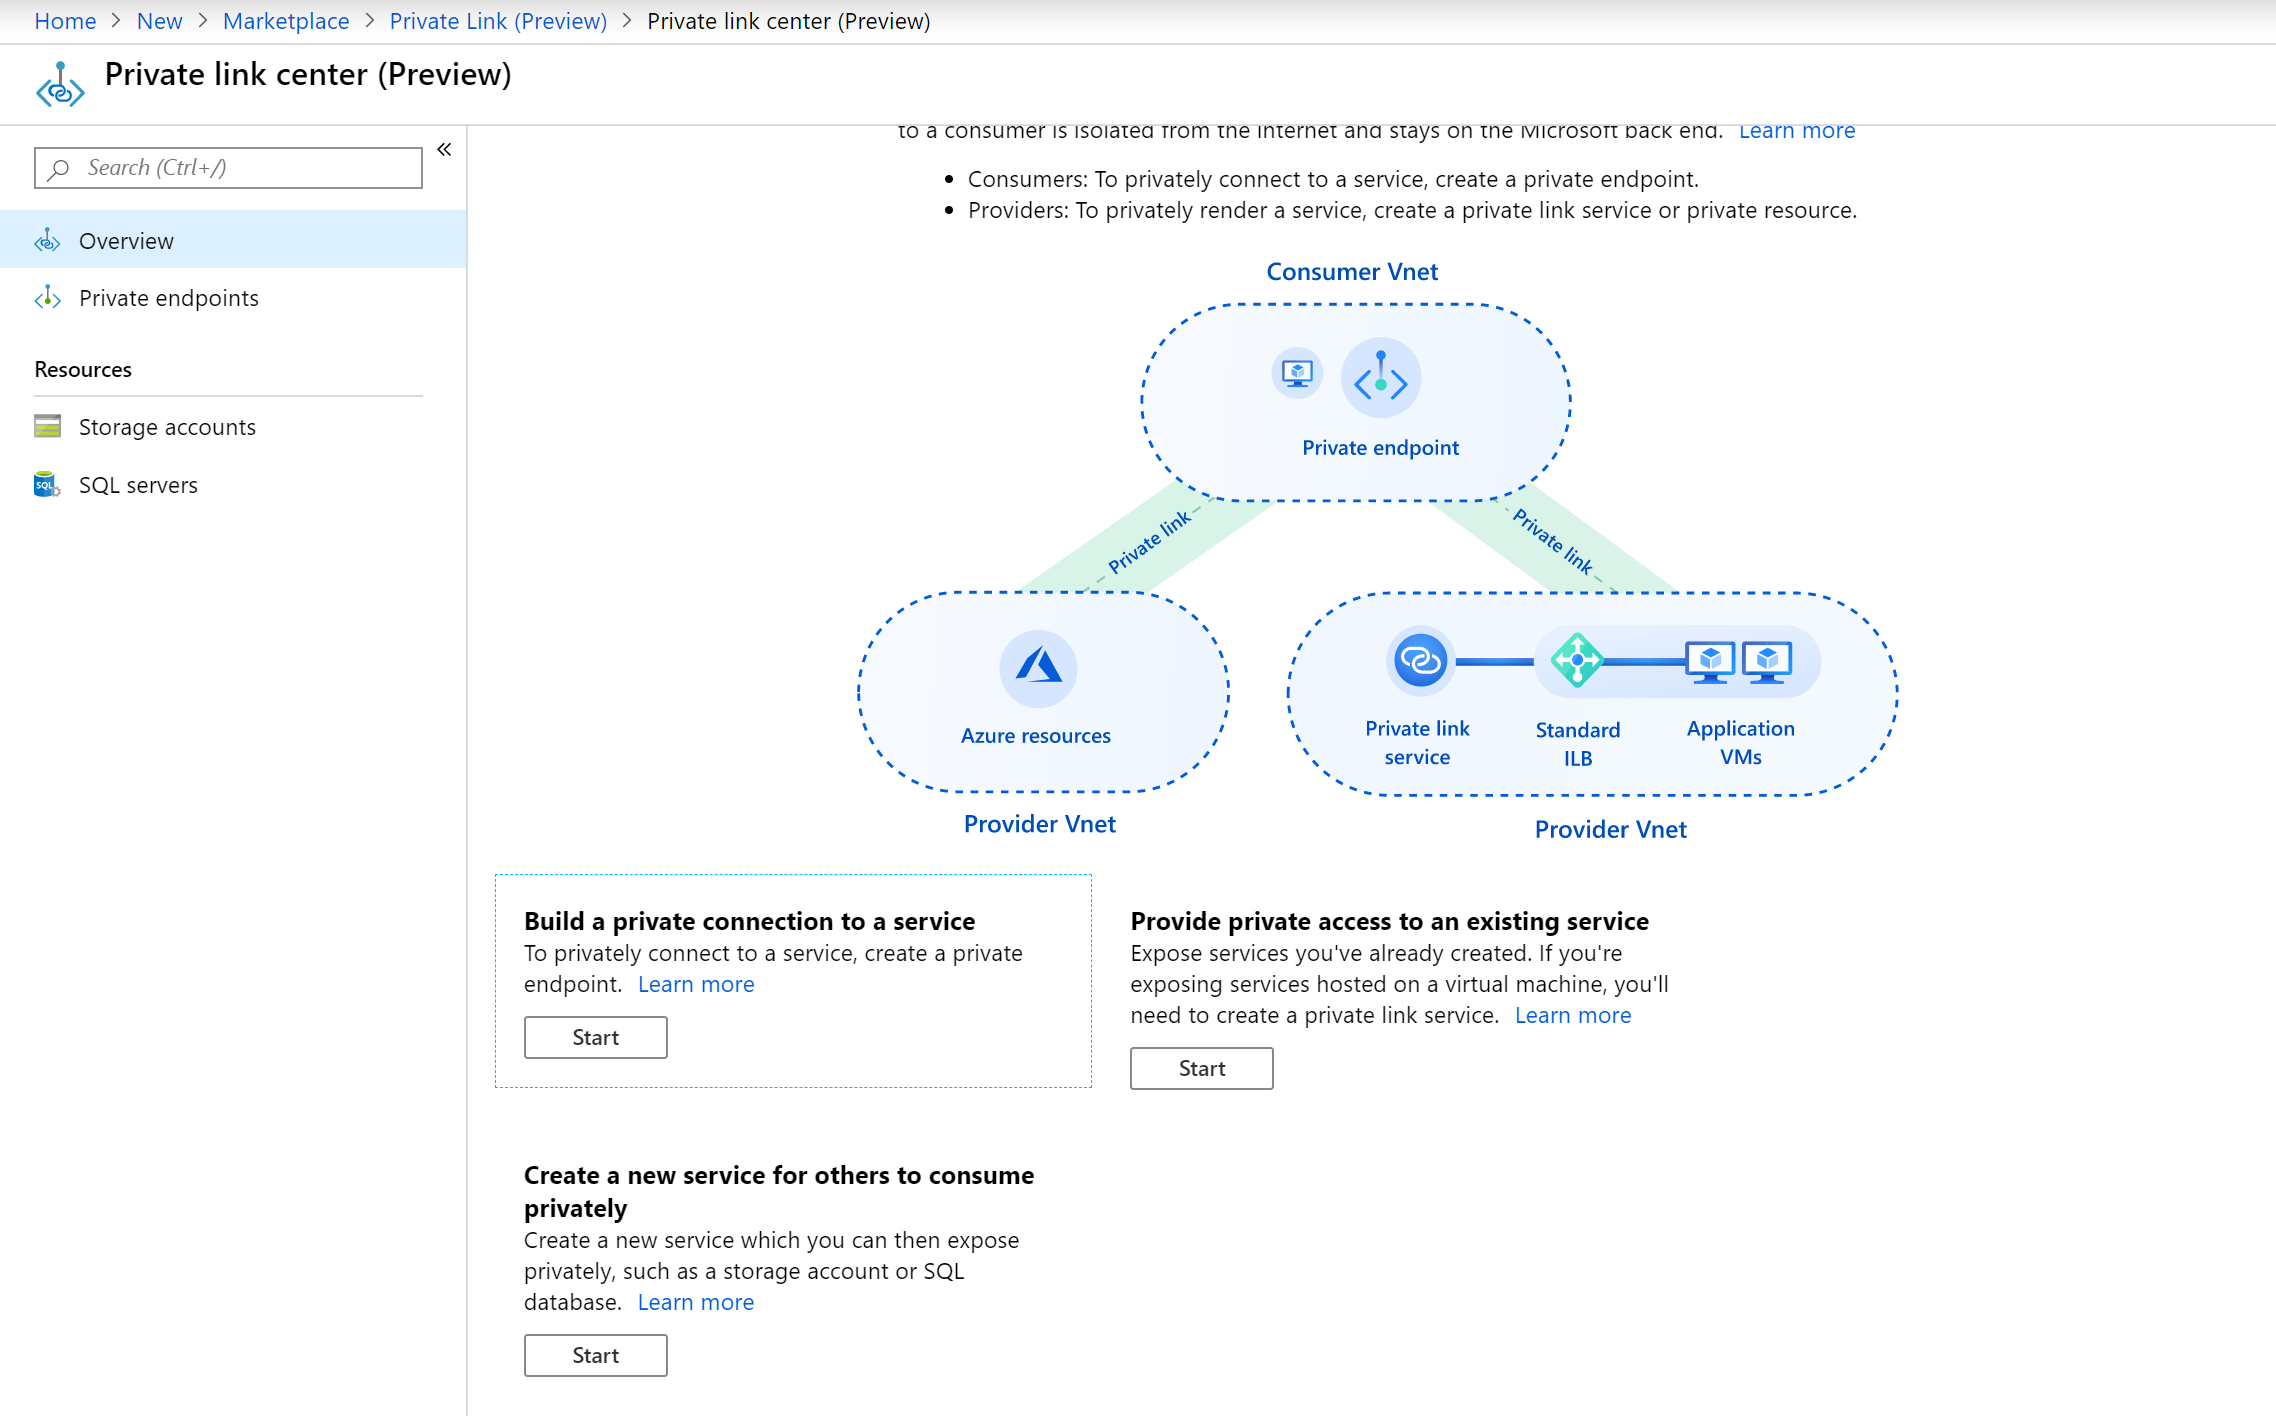
3. In Private Link Center – Overview, on the option to Build a private connection to a service, select Start.
4. In Create a private endpoint (Preview) – Basics, fill the details. The name of the service should be unique. Try a different one if it shows taken.
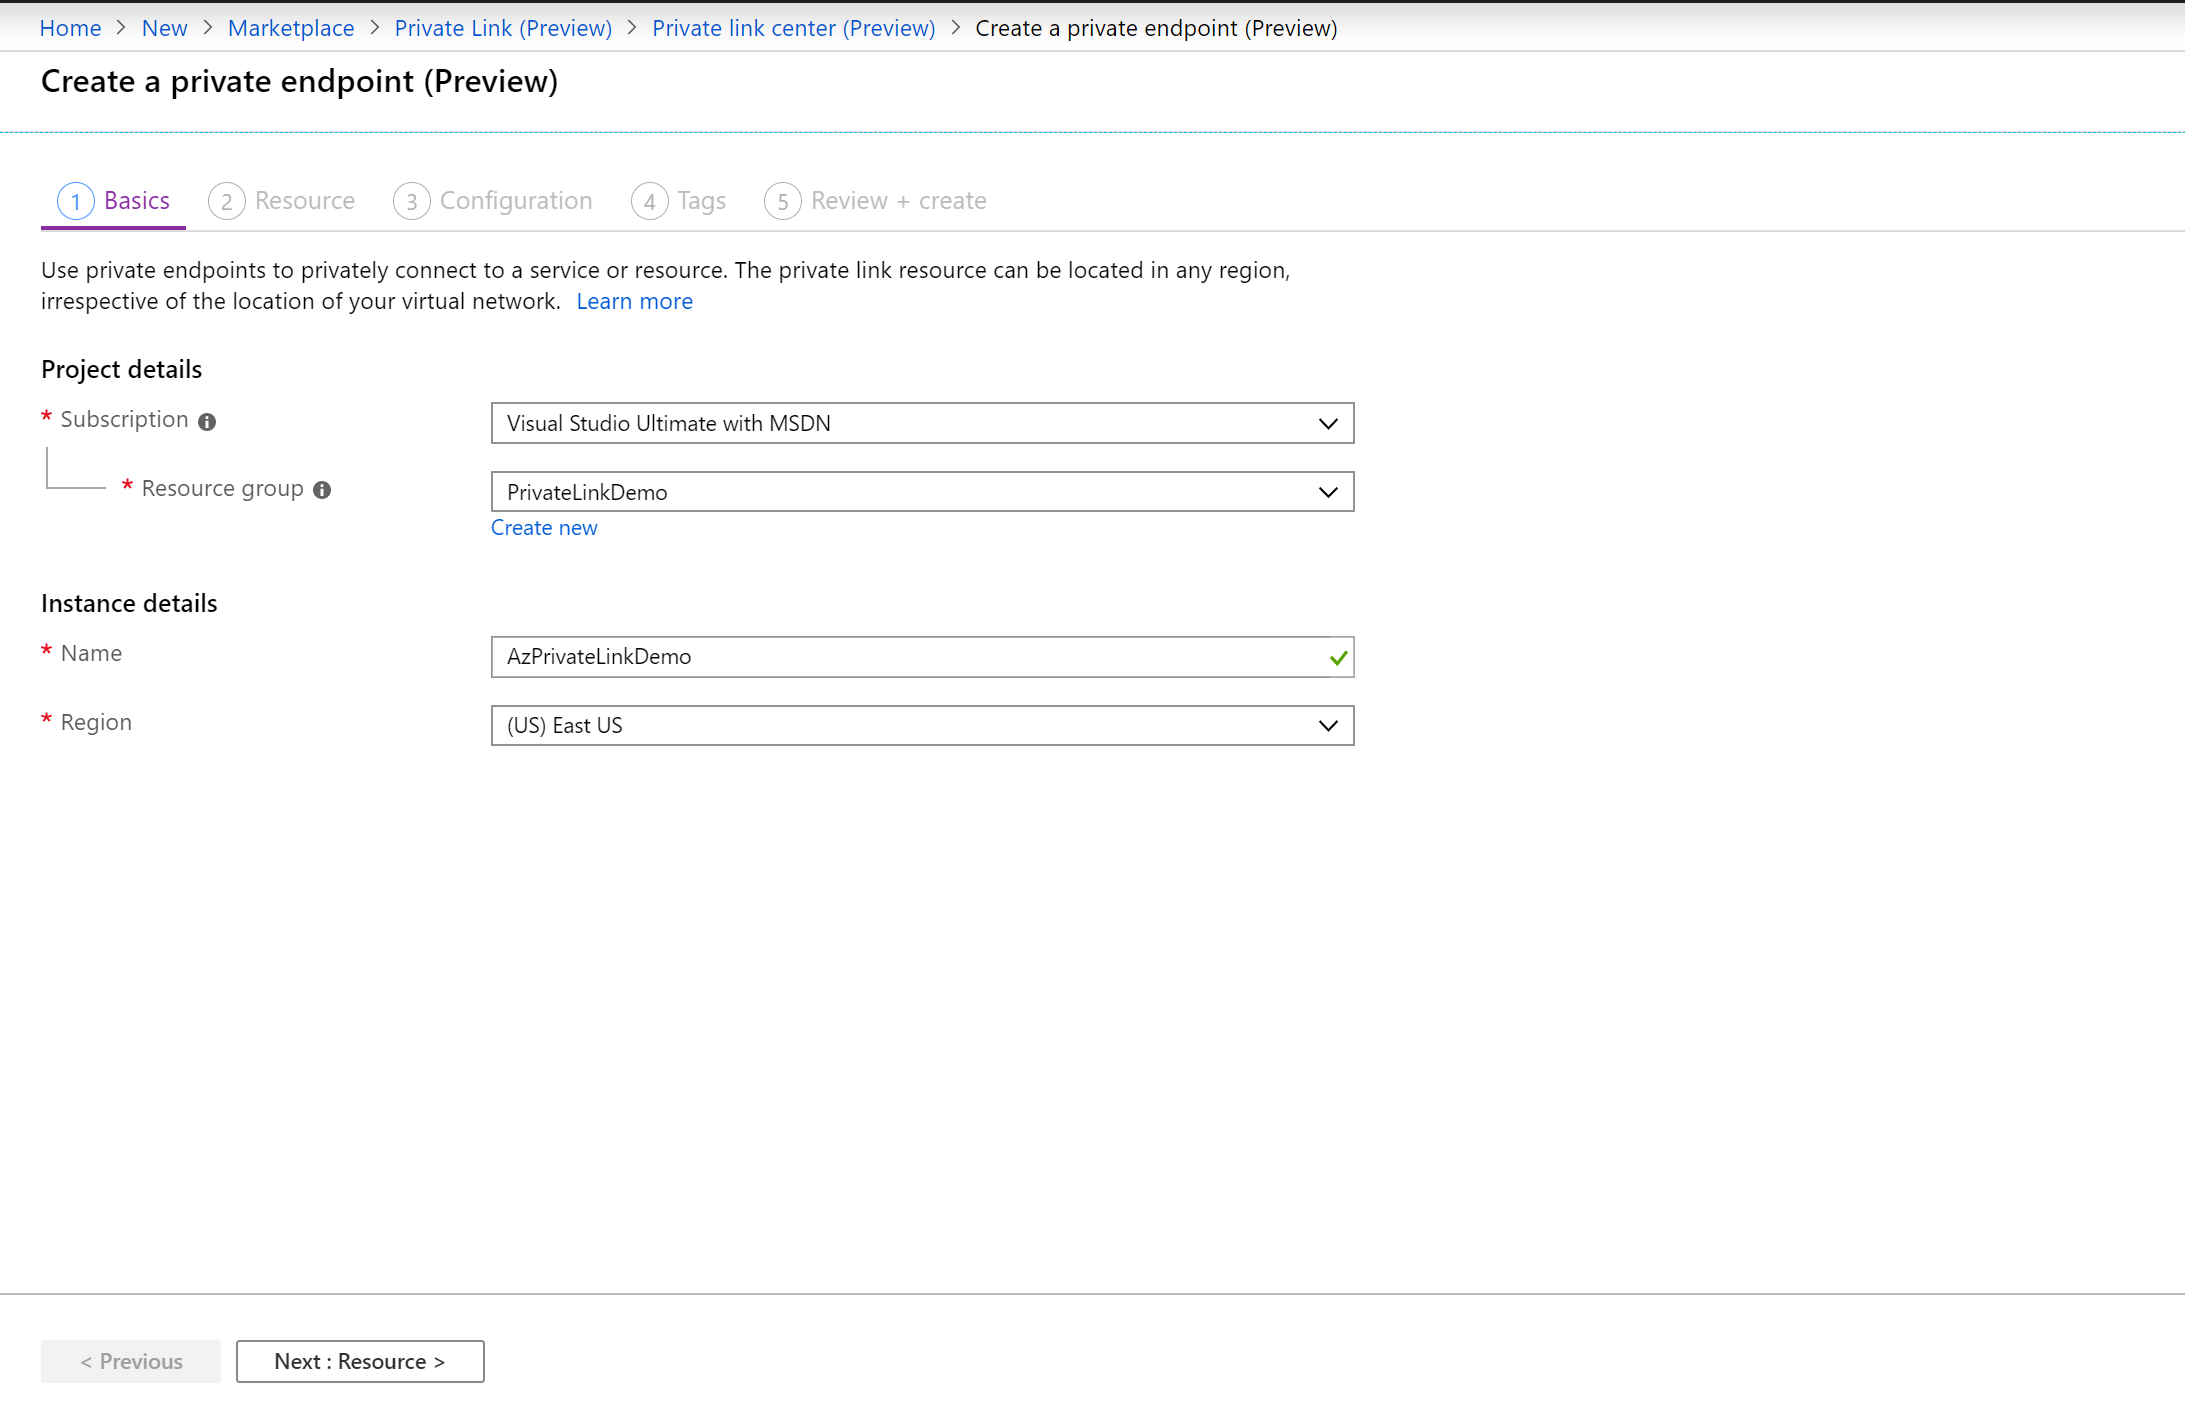
4. Click on Next: Resource
5. In Create a private endpoint – Resource, enter or select this information:
-
- Connection method: Select connect to an Azure resource in my directory
- Subscription: Select your subscription
- Resource Type: Select Microsoft.Sql/servers
- Resource: Select your Azure SQL Server for which you want to enable Private endpoint
- Target sub-resource: Select sqlServer
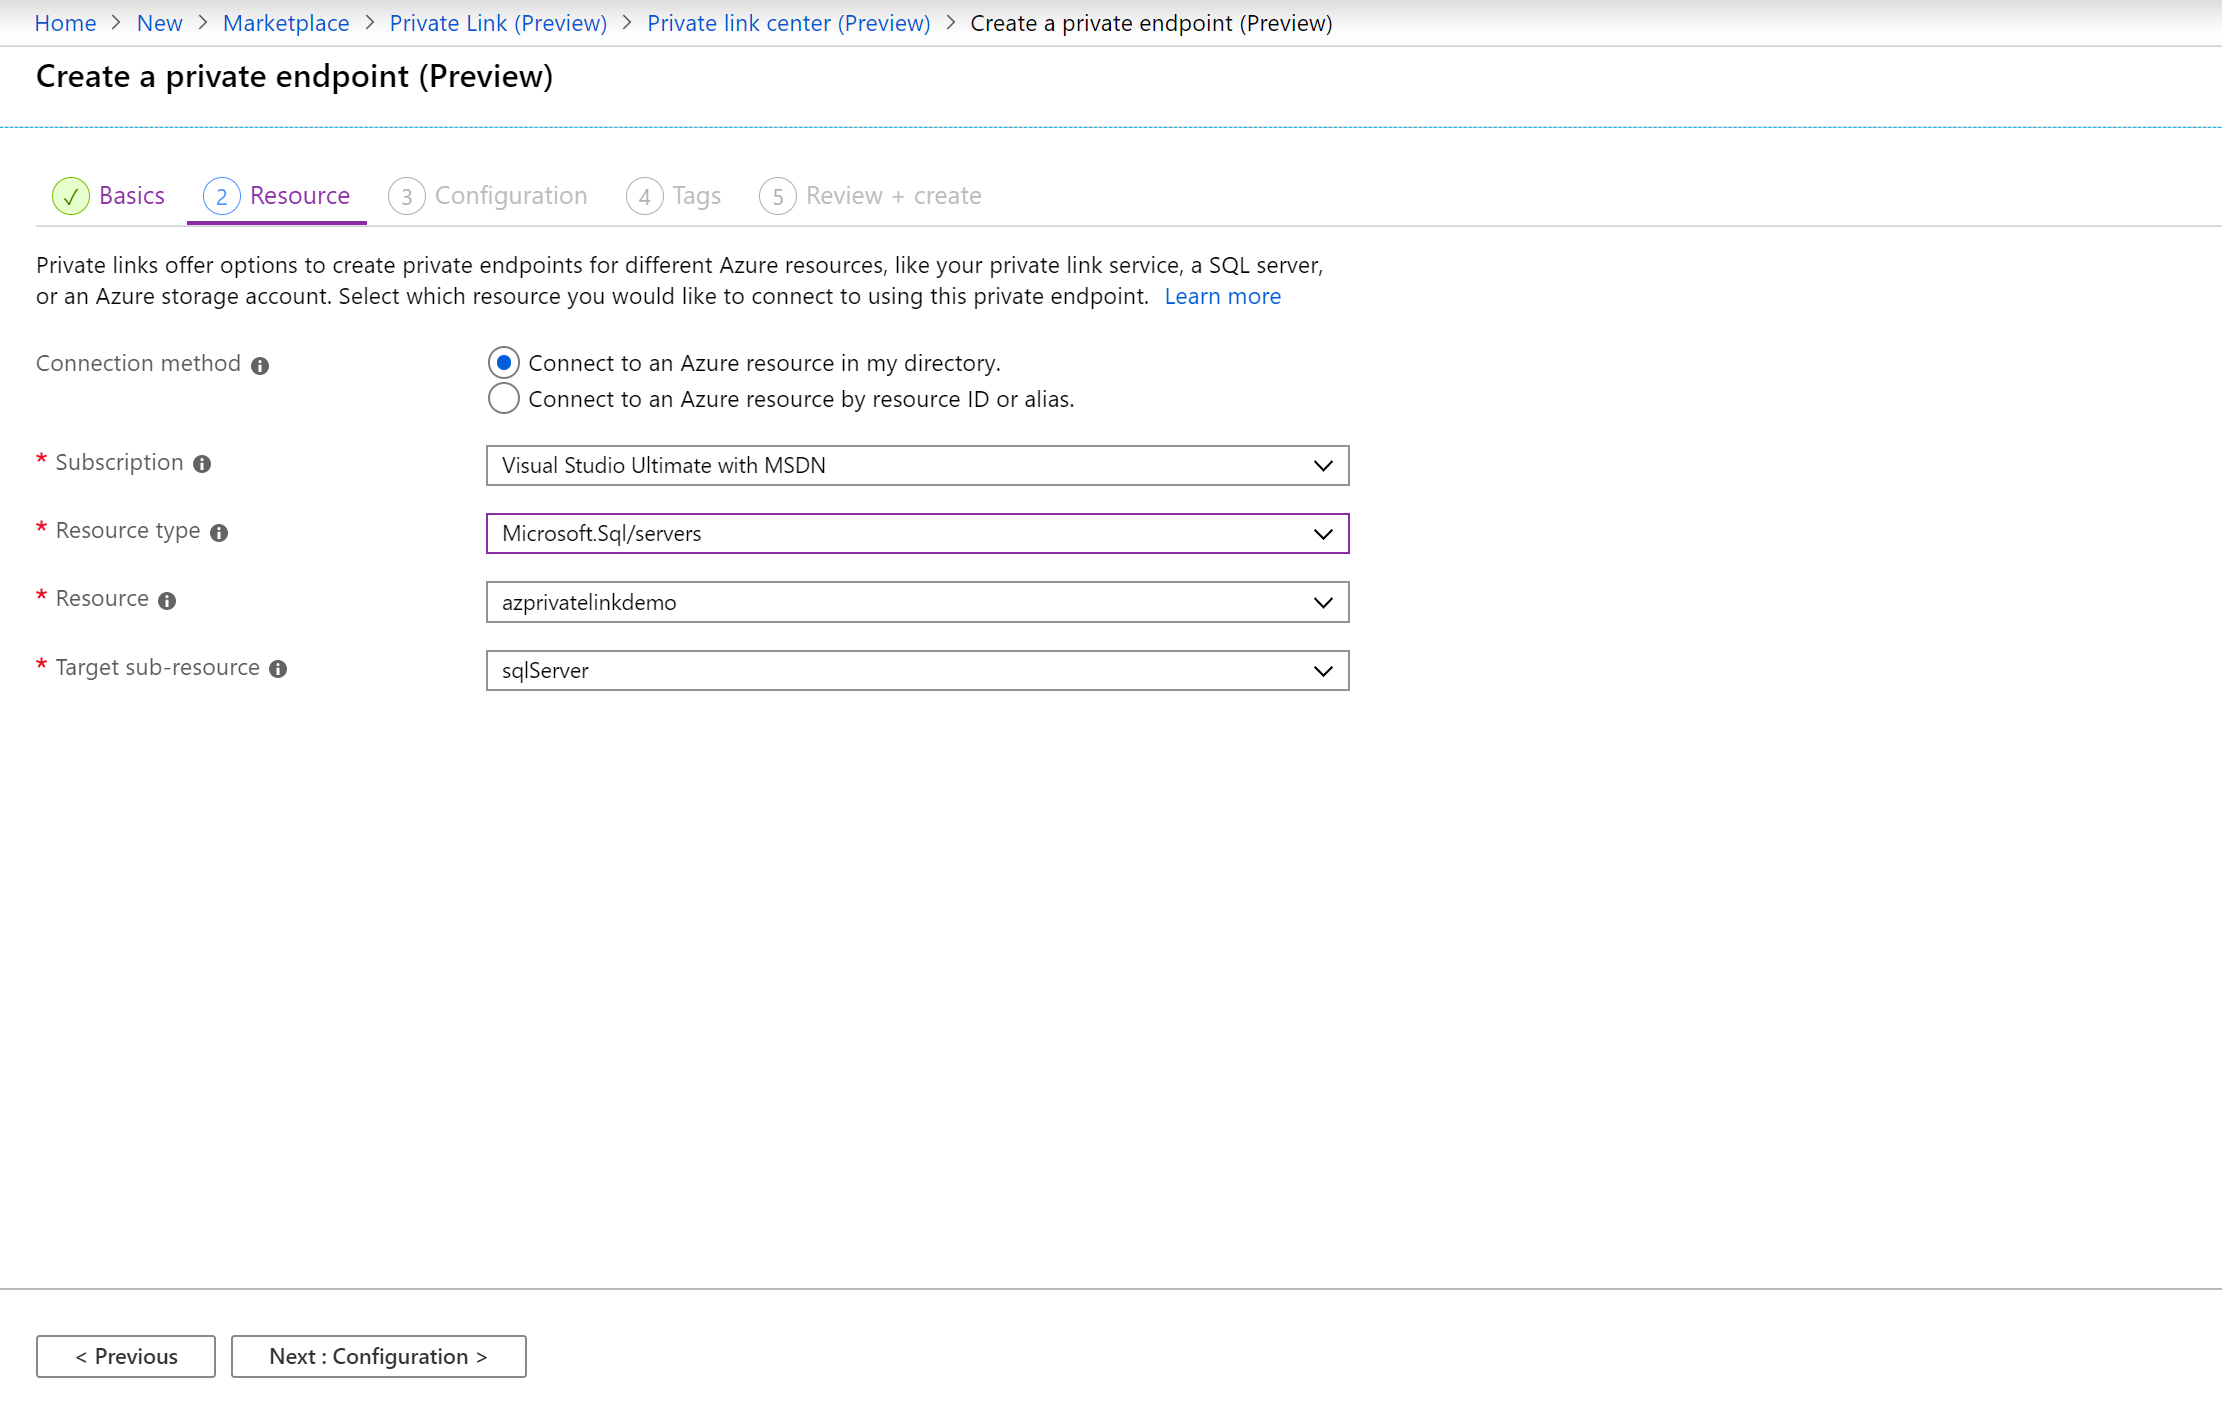
6. Click on Next: Configuration
7. In Create a private endpoint (Preview) – Configuration, enter or select this information:
-
- Virtual Network: Select the VNET in which you want to create the endpoint
- Subnet: Select the Subnet in which you want to create Network Interface for Private Endpoint.
- Integrate with Private DNS Zone: yes (We are enabling this so we can call Azure SQL Server using a hostname).
- Private DNS Zone: Leave with the default configuration
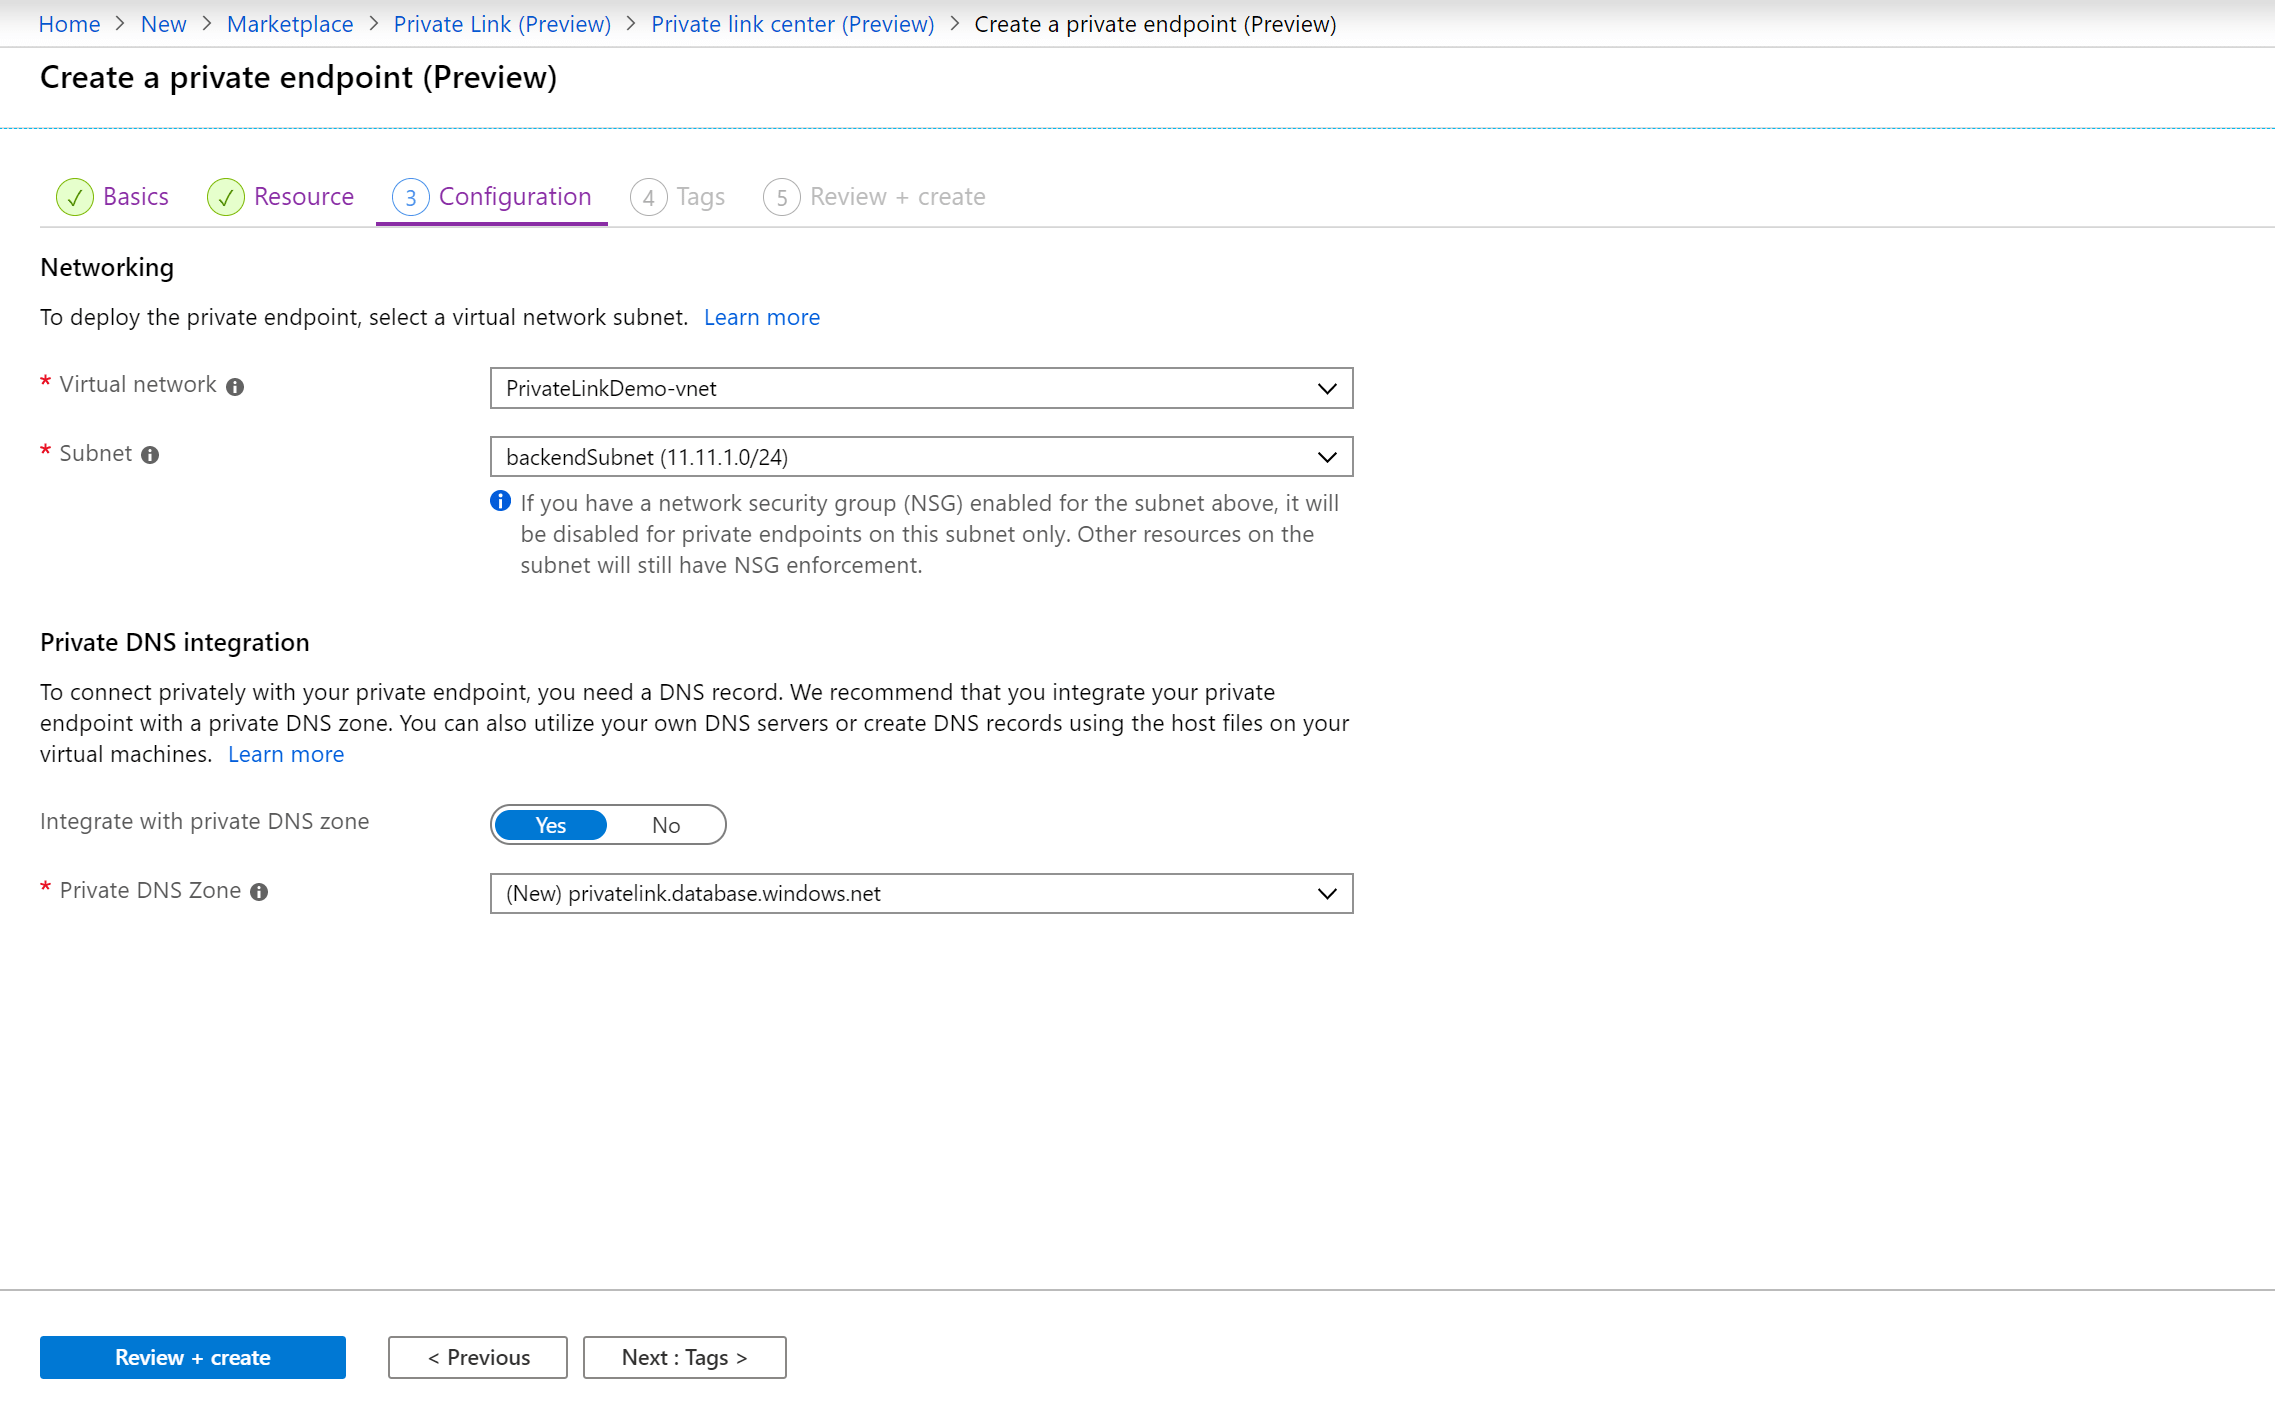
8. Click on Review + create. You’re taken to the Review + create page where Azure validates your configuration.
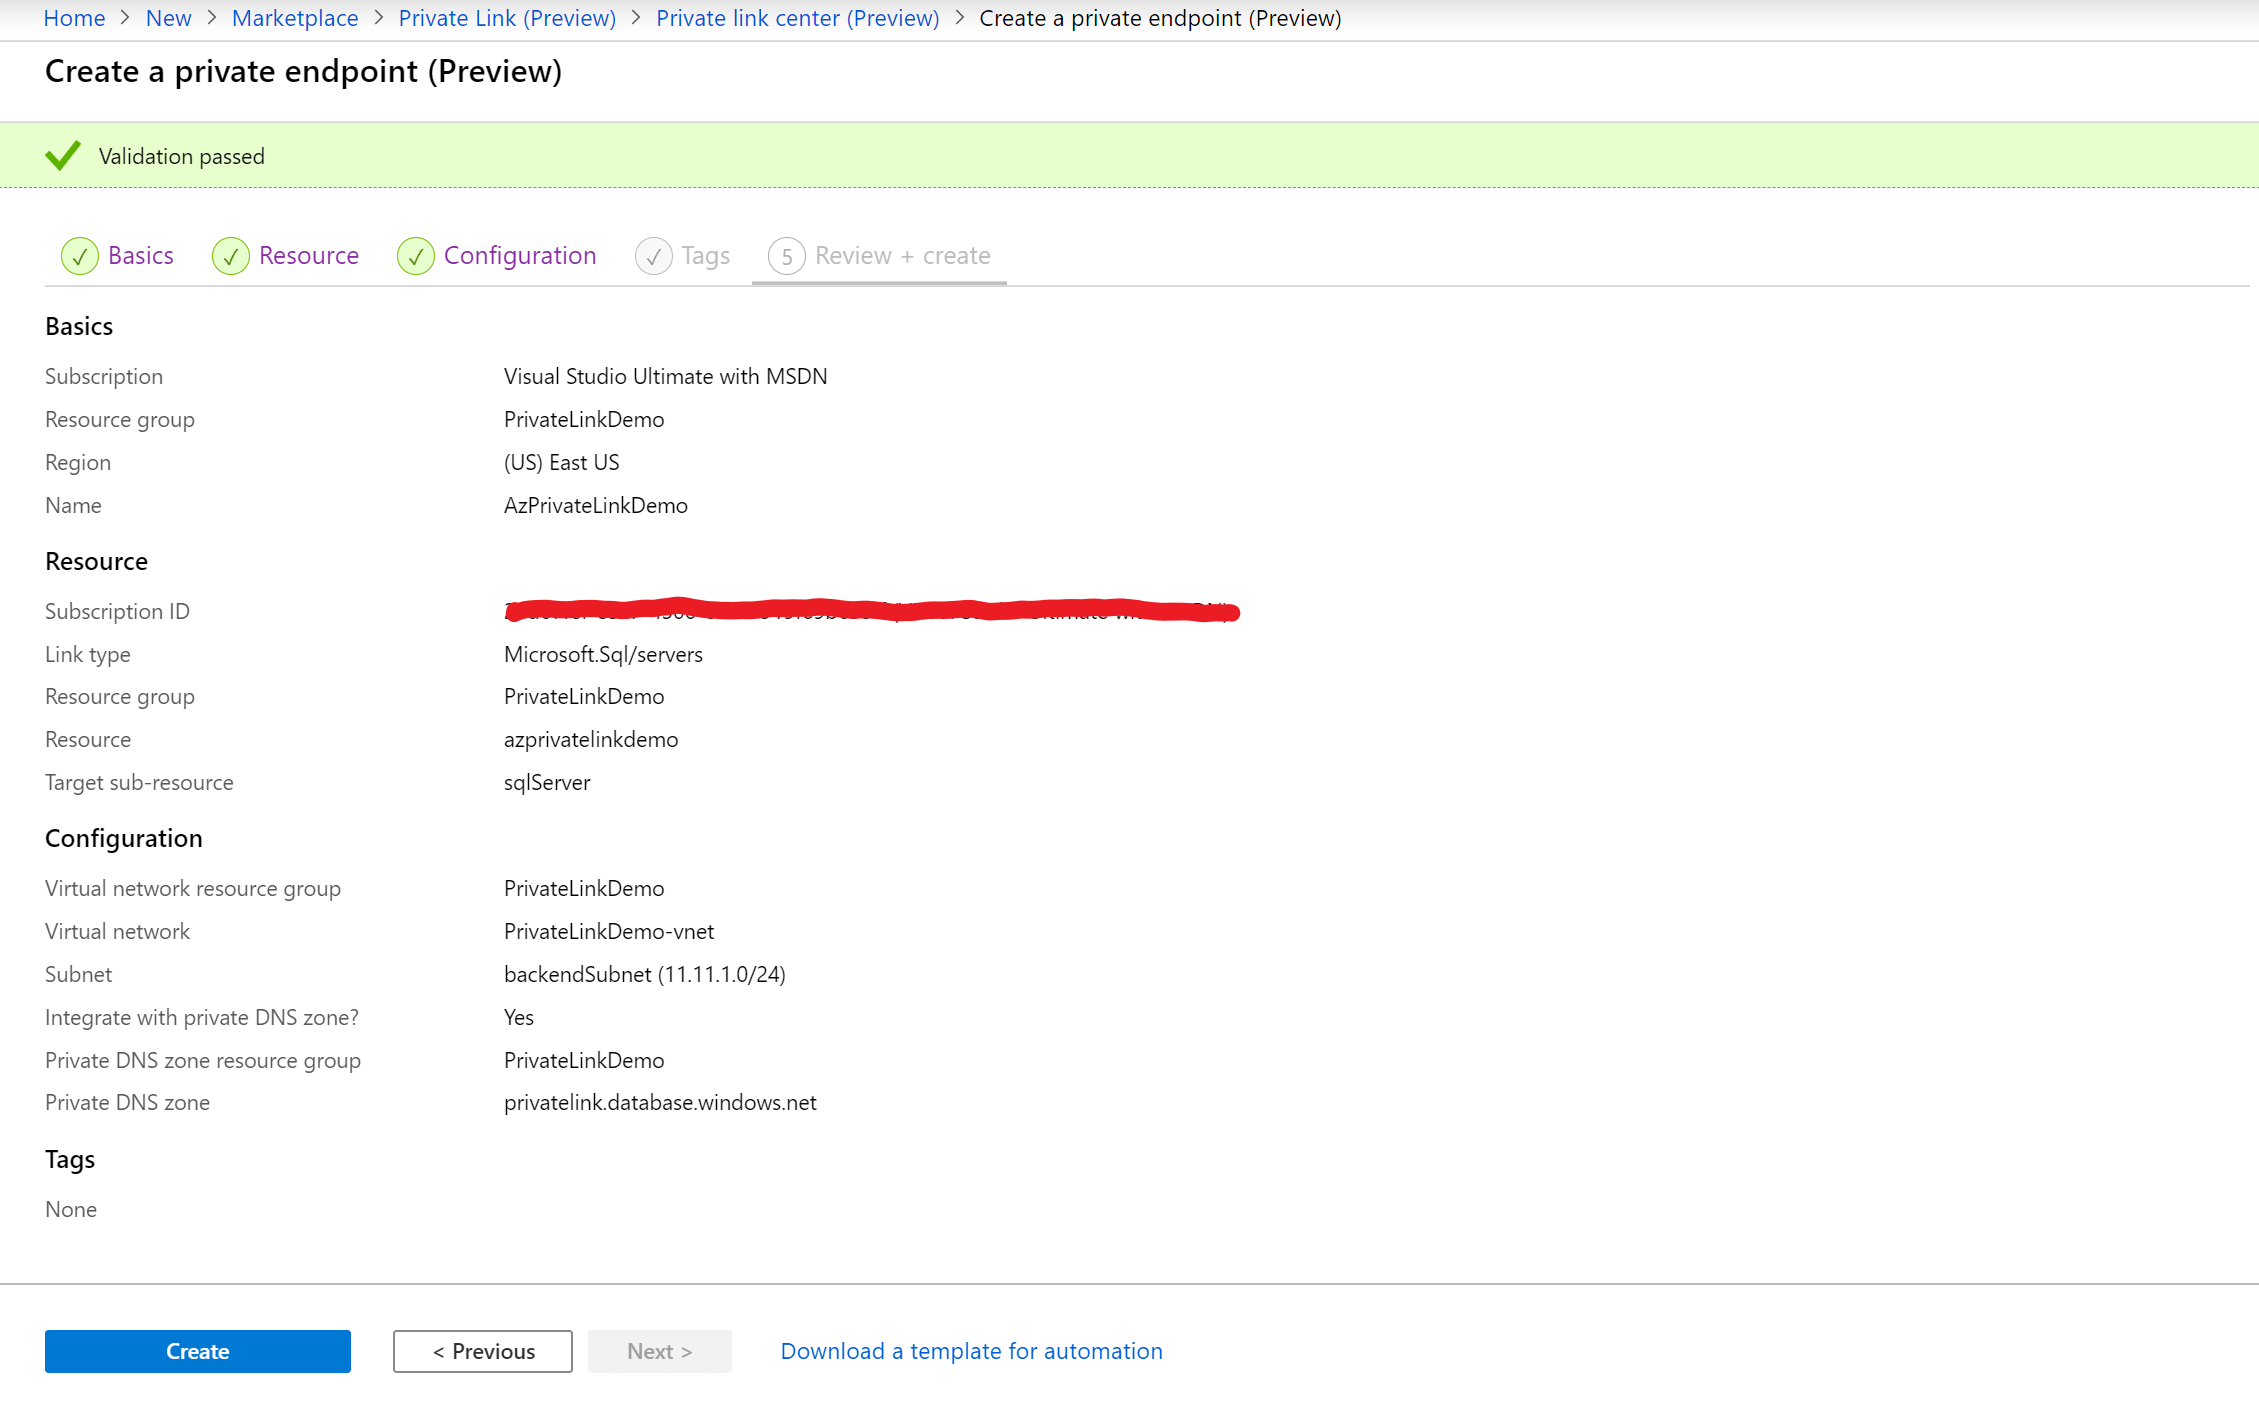
9. When you see the Validation passed message, select Create.
10. Let’s see what all the resources the deployment has created. The deployment has created a Private DNS zone and a Private endpoint. Let’s check the Virtual Network.
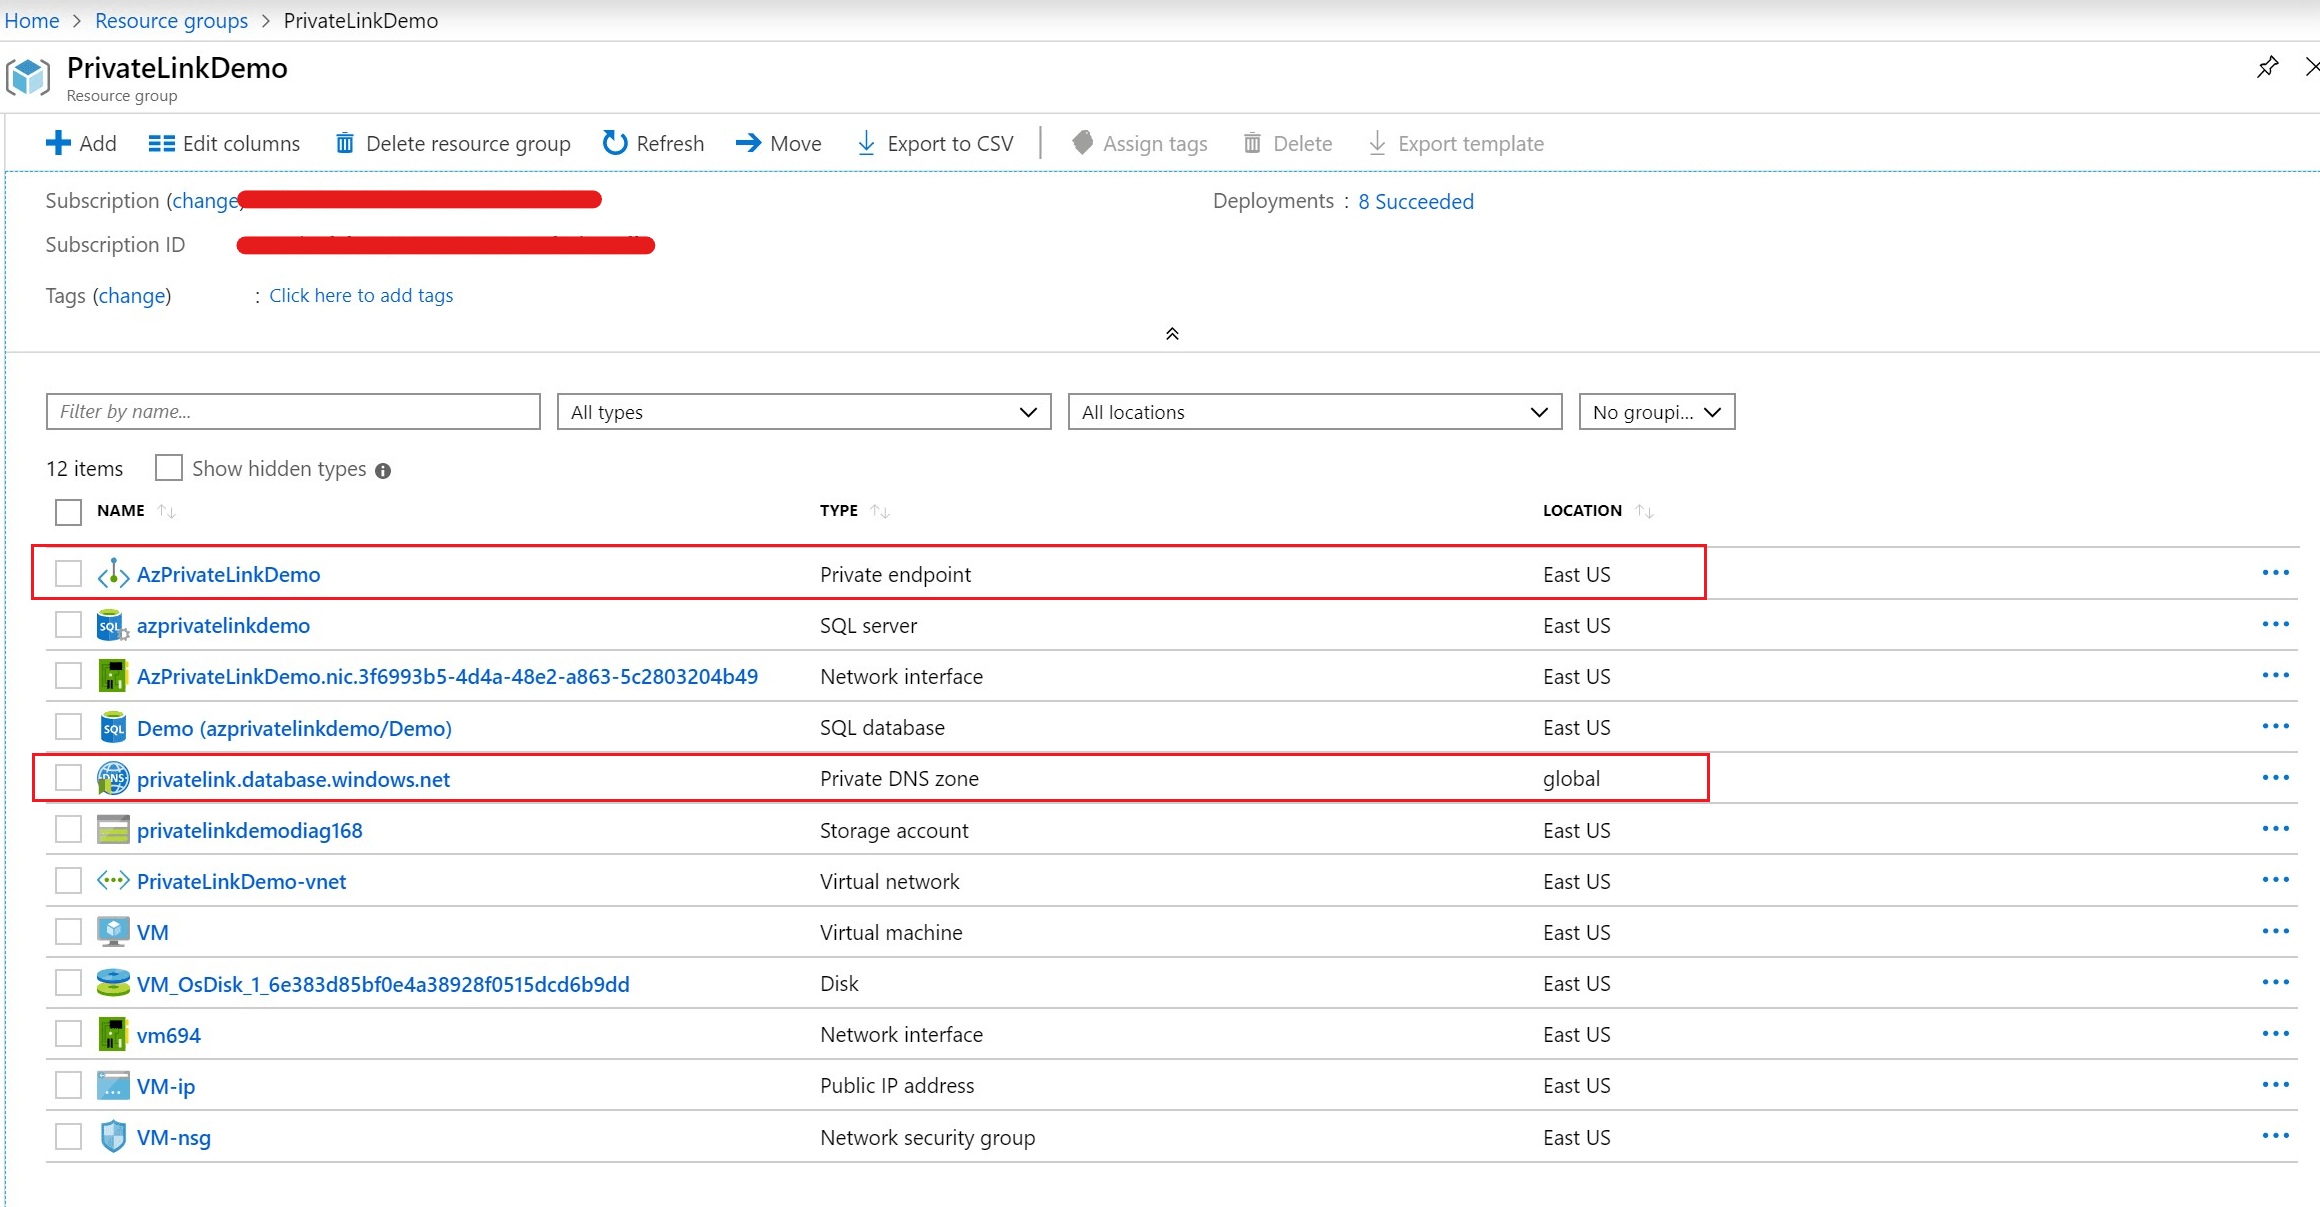
11. The Azure Private endpoint has created a Network Interface in the Virtual Network.
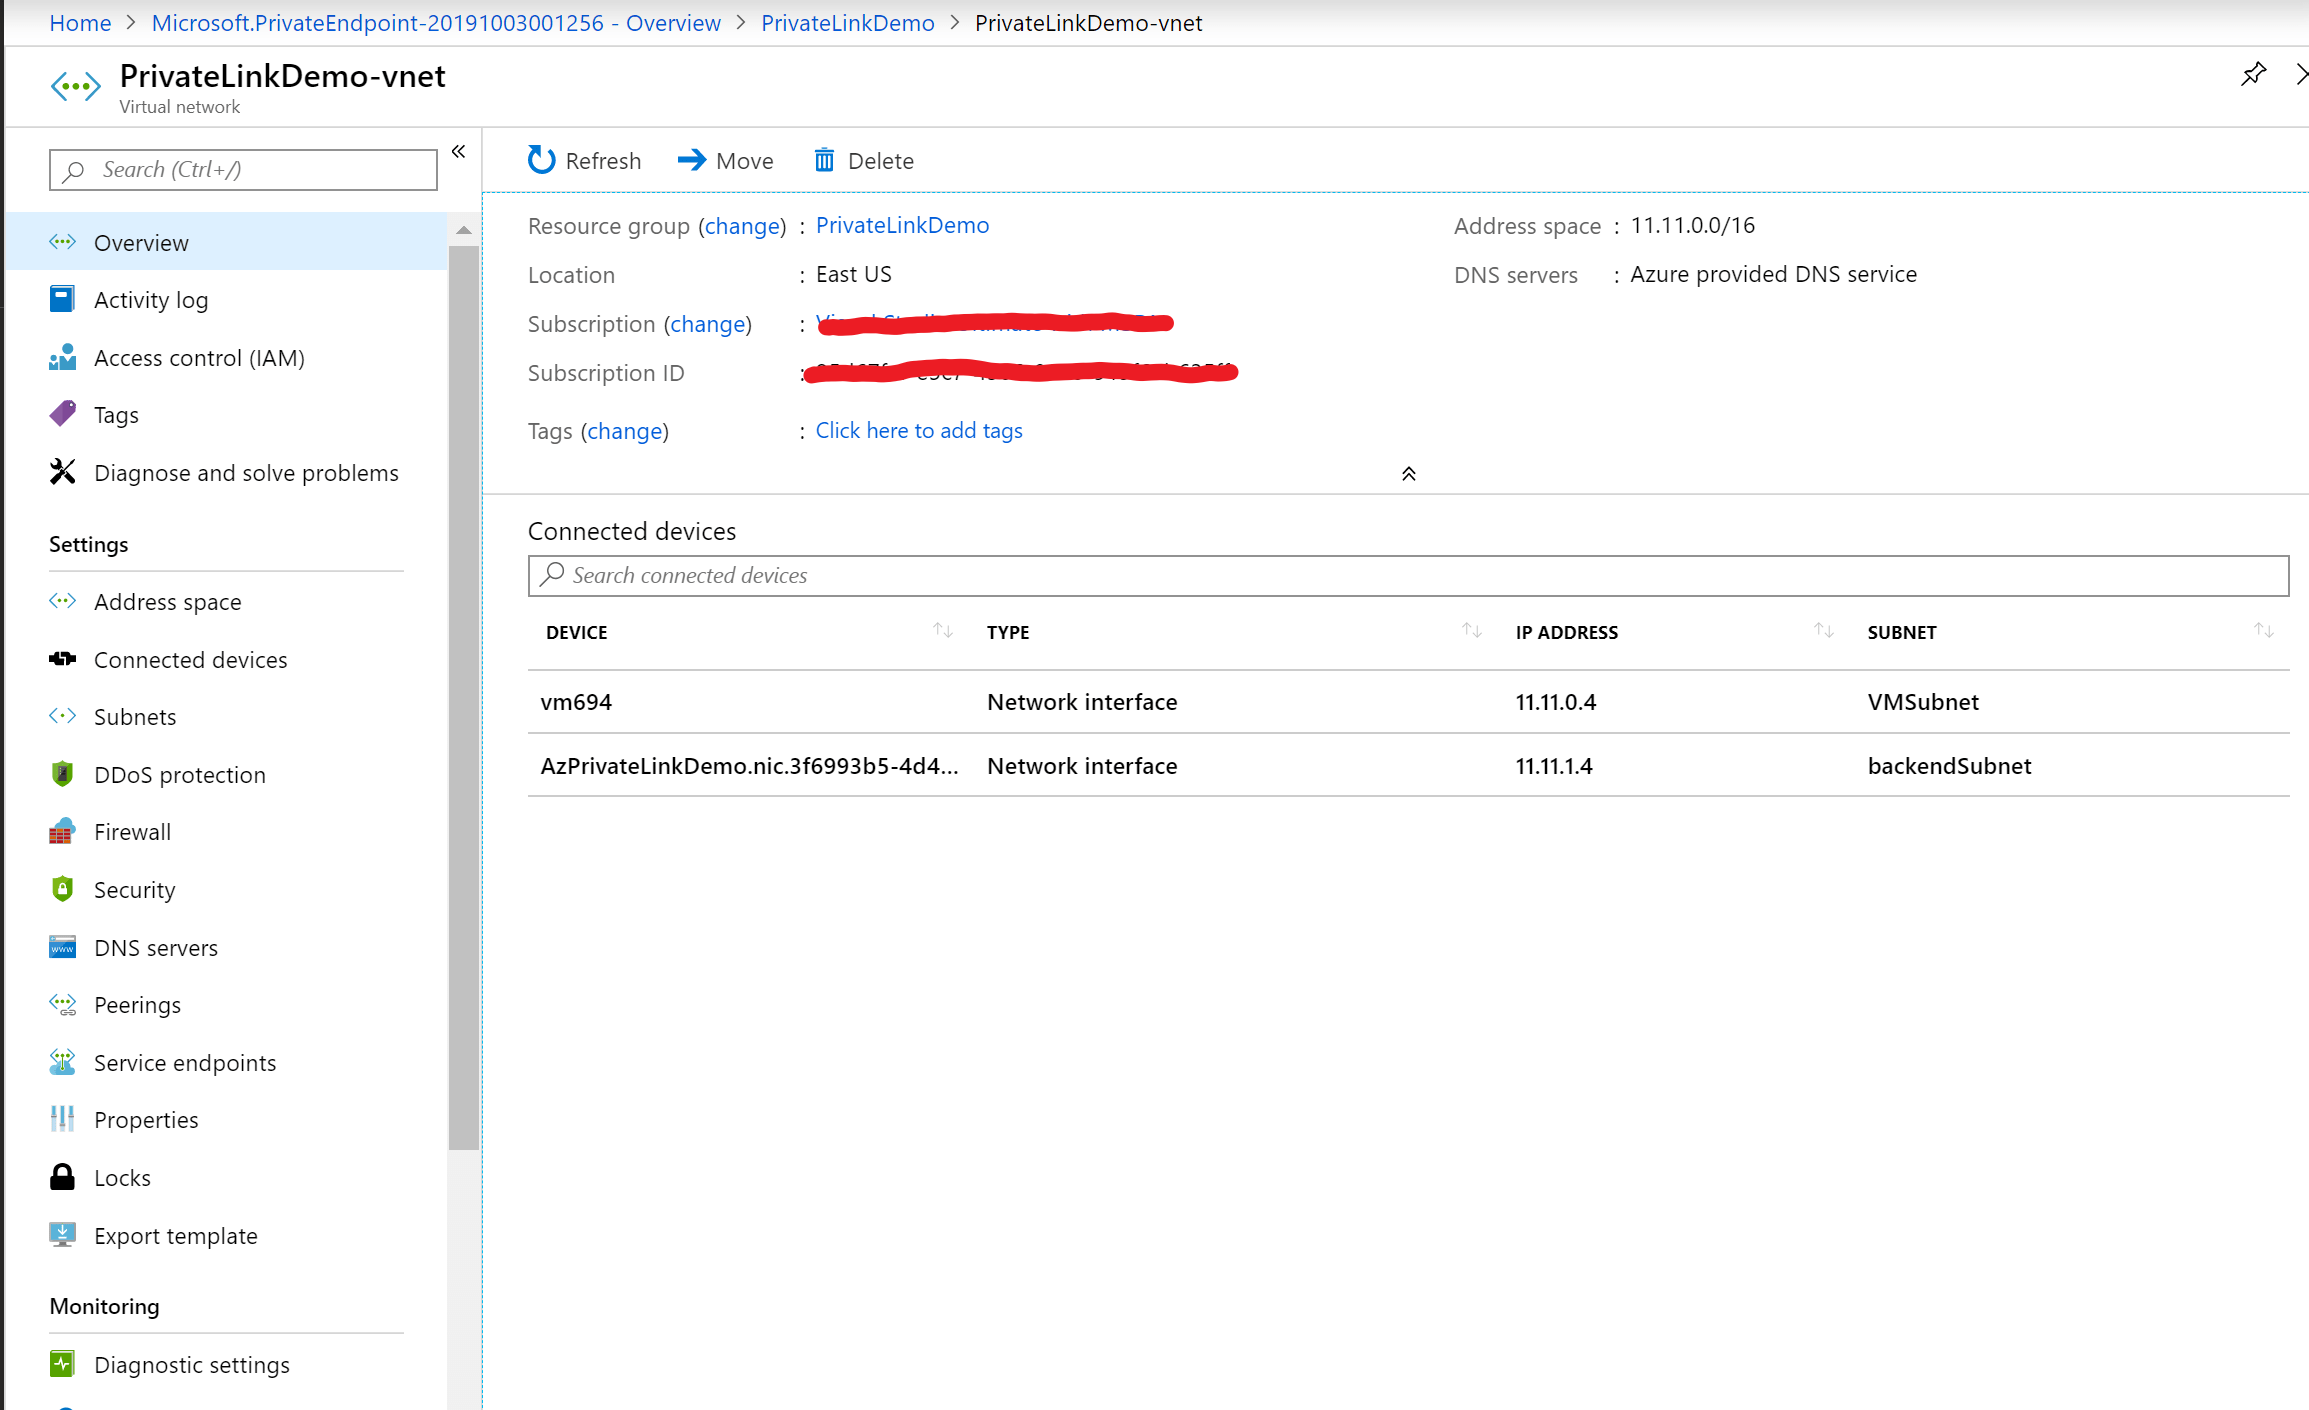
12. Let’s check the Azure Private DNS zone. We can see A record point to a Private IP of Network Interface created by Azure Private endpoint.
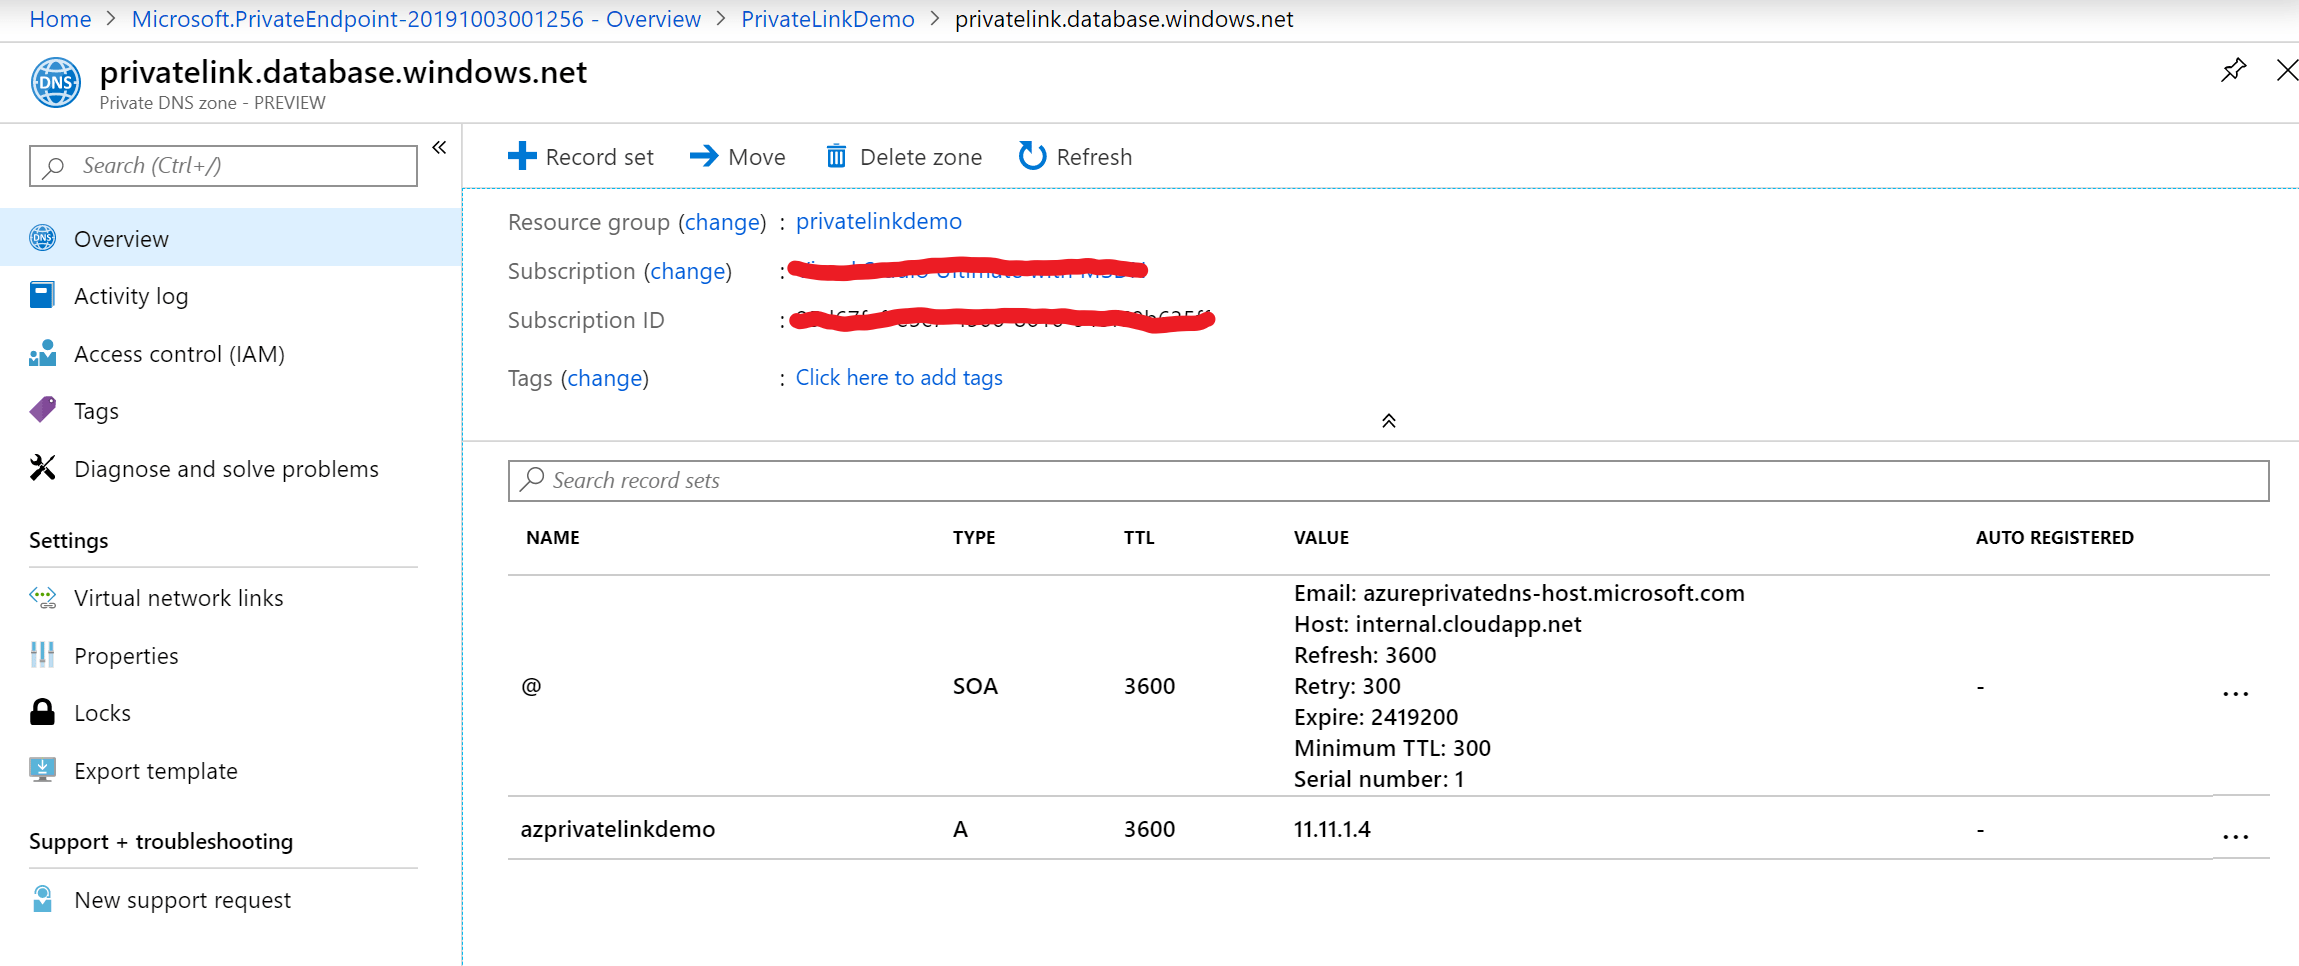
Access the Azure SQL server over Private endpoint from the VM:
1. The Private Endpoint has created a Private IP, and Private DNS zone has created a hostname. Let’s test the connectivity from an Azure Virtual Machine running within the same VNET where the Private Endpoint is.
2. RDP into the VM and open Command Prompt.
3. Enter nslookup azprivatelinkdemo.privatelink.database.windows.net. You will see below output. You can see in the output that hostname is resolving to the Private IP which is created by Private Endpoint fro Azure SQL Server.
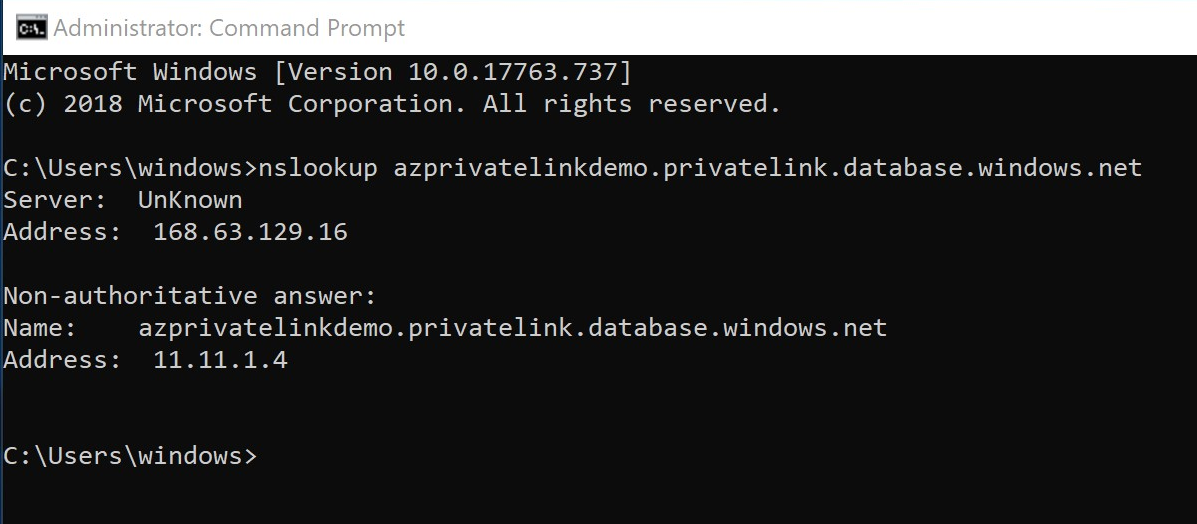
4. You can now use SSMS or any other tools to access the SQL Server using the hostname.
Note: The service is in Public Preview. I would not recommend for production
I hope you liked the post. Post your comments below if you have any.